Masthead header

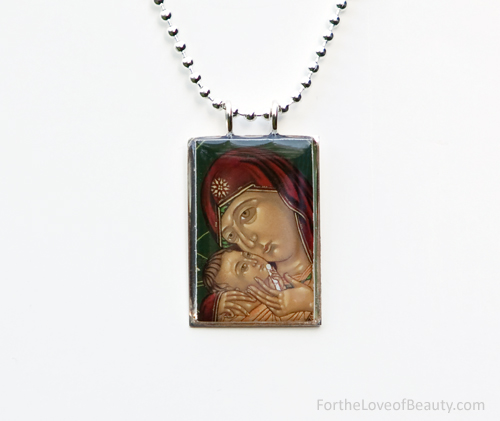
Our Lady of Tenderness Pendant

I’m so excited to announce my first giveaway!  Who doesn’t love fun prizes?!  I know that the few times I’ve ever won anything, no matter how insignificant or small the prize was, it always made my day and made me feel somehow special or lucky that my name from among everybody else’s was chosen.  I think it acts as an affirmation that we are all somehow specially chosen and winners of a great prize if only we participate and put ourselves in the game.   As a Catholic, I believe that the only way I’ll win or attain the greatest prize of heaven is if I truly live my life as though I was running a race so as to win it. [St Paul in 1 Cor 9:24] 

That’s why I’m really going to look forward to throwing out little encouragements in the form of prizes by using my skills and talents that I share with you.  I plan to have several announced (and unannounced) drawings, prizes, contests…for my faithful readers.  I am no different than you and will sometimes need your support and encouragement as well while I make my way in the world making and sharing my photographs, paintings, and reflections.  Do feel free to leave me your comments and questions because I love to hear from you. 

My first prize will be an icon pendant of Our Lady of Tenderness.  The original icon that I painted is an 8×10″ egg tempera on wood panel that you can see in full HERE  (I’ll talk more about the symbolism next time when I announce the winner.)  I decided to make my icons into pendants because I wanted a beautiful, colorful, sacred art image to wear as a sacramental rather than just a plain medal made of metal.  This pendant was the first in a growing line of pendants that I’m making in collaboration with a jewelry designer.  The pendants are made of solid sterling silver and completely waterproof.  They are also made here in the USA which I am very happy about.  Feel free to get it blessed by your local priest and enjoy it as your new sacramental heirloom. For my inaugural giveaway I am also throwing in the solid sterling silver 18″ ball chain so the lucky winner will be able to put it on right away!   The pendant and chain are a $145 value.  (My line of pendants are still in the final phases of development and are not currently in stores.  But those that are available now, which I’ll be posting soon, can be ordered directly through me.  They take several weeks to be delivered because each one is made to order.)   

For this prize, those who will be eligible are going to be only those who have subscribed to my posts by email.  So if you went to the top of my blog site and entered your email where it says “enter email here,” clicked “subscribe”, and you’ve been receiving my posts in your email inbox, then you’re in!  If you are reading this and you are not currently an email subscriber yet and would like to be, you still have time until April 30th at midnight.  You must follow the complete instructions to activate your subscription. 

I look forward to announcing the winner in my post on May 1st.  Stay tuned!

Happy Feast of St Catherine on Siena  – one of my heroes!

  • Zoe - April 29, 2010 - 11:12 pm

    Yay! I’m on your list, I’m reading, and I would love to win your beautiful pendant so pick me, pick me! (Or any other worthy reader, of course…)

  • Hedvig - April 30, 2010 - 12:28 am

    Oh, Renata! This pendant would make a beautiful Christmas gift, (or Mother’s Day gift!) I wish Zoe and I could both win it 🙂 It’s lovely!

  • Jocelyn - May 1, 2010 - 11:23 pm

    Wow! I won! I am so humbled and excited! How did this happen?! 🙂 I look forward to wearing an original piece of art worn by you!

TV (or Shutter Speed) and AV (or Aperture), are the primary ways to control your exposure or how much light passes through the lens. 

The shutter (here is an image of a leaf shutter system) of the camera opens can closes at particular speeds in order to allow a specific amount of light to hit either the film or the camera’s sensor.   The longer or slower the shutter speed equals more exposure and the faster the shutter speed equals less exposure.  Shutter speed is normally measured in fractions, such as 1/125 of a second, and the range of speeds depends on the camera type. 

The faster the shutter speed the more it freezes motion and the longer the shutter speed the more movement will be captured.  For example, if you would want to capture a sprinter as he runs past you and freeze his motion, you would use a high shutter speed like 1/2000 of a second.  If you wanted however to show motion, like the runner streaking past you in a blur to indicate how fast he was going, then you would slow down the speed to something like 1/30 of a second for example.  It all depends on what look you were going for. 

Camera shake occurs when the shutter speed is low, say less than 1/30 of a second, because the photographer may not be holding the camera still enough.  So not only will he capture the motion in the scene he is shooting, but he will also capture the motion of how he’s moving the camera.  Camera shake really depends on how still the photographer is able to hold his camera and everyone is different.  To minimize camera shake, it is good to practice ways of bracing your elbows against your body or leaning on something sturdy and of course using a tripod would eliminate camera shake altogether if used properly.  Depending on ability, practice and a suitable subject, it is possible to hand hold a camera at speeds as low as a ¼ of a second if need be. 

Aperture is the size of an adjustable hole that sits in front of the shutter and also controls the amount of light that hits the film or sensor.  Apertures are measures in f-stops usually between f/2, f/2.8, f/4, f/5.6, f/8, f/11, f/16 but that also varies depending on the lens or camera (if it’s a point and shoot). 

Now this part may be a little confusing: the larger the f-stop number, the smaller the whole and the less light that passes through, and the smaller the f-stop number, the larger the whole and more light passes.  See the f-stop diagram for a visual. 

As well as the size of the aperture controlling the amount of light, it also controls the Depth of Field or how many things are in focus between the lens and the farthest thing in your scene or subject.  The wider the aperture (or the larger the hole like f2.8) less planes will be in focus, giving a shallower depth of field, while the more narrow aperture (or smaller hole like f22), more things will be in focus, having a greater depth of field. 

The aperture control is a great tool when making creative choices like wanting to take a portrait of someone and you would like to blur the background in order to make your subject stand out more.  Or sometimes you just don’t like the background and it looks too busy or unappealing and you don’t want it in your picture.  Conversely, if you are in Paris and you want a nice clear shot of you and the Eiffel Tower together, you’d want a narrower aperture like f22 to make sure both focus points are sharp. [More on the creative use of depth of field in another post.] 

So how does Shutter Speed and Aperture control Exposure? 

Shutter speed and aperture work together to control how much light passes trough the lens.  The slower the shutter speed and the wider the aperture, the more light will pass, the faster the shutter speed and the narrower the aperture the less light will pass.  So the last thing you want to do is take a picture of someone in full sun with a setting that reads 1/4 at f2, because you will have an overexposed image, probably almost white, or set the camera at 1/1000 at f22 at night or very low light and you will get a dark, underexposed images for sure. 

In Auto mode, the camera chooses these settings for you based on what it thinks you are taking a picture of.  If you wanted to have greater control over the aperture and shutter for creative purposes, normally you would choose what’s most important in any given shot. If you need to freeze motion then you need to choose a fast shutter speed and you make the shutter speed the priority.  Some cameras have TV Priority mode where you select the shutter speed and it selects a corresponding aperture that will give you a basic exposure for middle grey.  [See my last post for a refresher on middle grey.]  Or conversely, if you want to blur out the background for example, you could put the camera in AV Priority mode or aperture priority by telling the camera you are choosing the aperture based on your desired depth of field and you want it to choose an appropriate shutter speed.  Then to fine tune your exposure you can turn the Exposure Compensation dial to over or underexpose by a stop if needed. 

For maximum control you can set your camera to Manual mode and choose both the Shutter Speed and the Aperture (bypassing the need to use the Exposure Compensation dial for corrections).  You would need to accurately meter your subject of course to be able to get a light reading to know how to set your TV and AV.  One easy way would be to use one of the priority modes to get you some TV and AV numbers to start with and then switch to Manual mode to further adjust your TV or AV to where you want it.  The advantage to being in Manual is that your TV and AV won’t change from shot to shot.  So if you are shooting several frames of the same scene and you want the same exposures for all of them, then Manual mode would be a good choice because in any other mode, the camera takes a reading each time you take the picture.  If a flash of light or something dark, (that is not important in your subject) pops up, it can throw off your exposure and you’ll need to start over with ever shot to make sure your exposure is correct, and you’ll be turning that Exposure Compensation dial back and forth a lot. 

There’s a lot in this post, but understanding TV and AV is not only important for choosing creative effects but for setting the correct exposure as well.  Try locating those modes on your camera and do some experiments with changing the settings.  If you don’t have a camera, try learning to see depth of field by holding your finger out in front of your eyes, then focus on it and switch to something in the background, then back again, each time focusing on different distances.  Notice how different planes come in and out of focus at different times. 

Up for a little fun?  Click HERE for a really great online tool to practice these concepts with.  Read the explanation below the virtual camera to see how to dial in your desired aperture and shutter speed combinations and how to use the other features.  Have Fun!

Also, look at my last post of photos and try and guess whether I used a narrow or wide aperture on the various images.   This will help you see how depth of field looks and works. 

Next week I’ll talk about ISO and how that affects both Aperture and Shutter Speed.

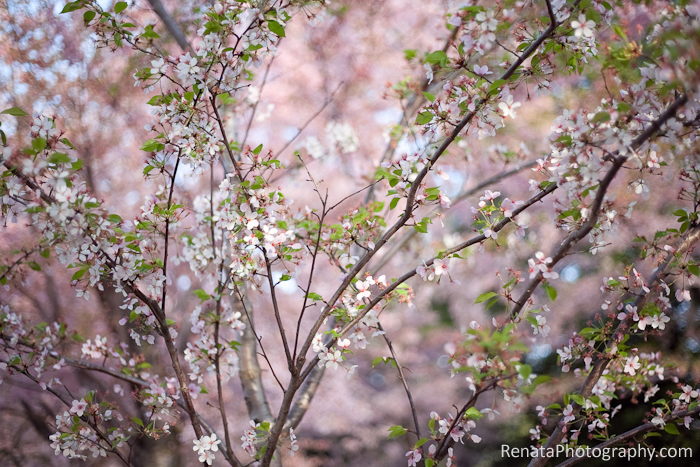
I have to admit I always get a little sad when the last blossoms of the Cherry Blossom tree have fallen, and these trees that once stood apart from all the rest in soft pick glory and welcomed over a million visitors, have now faded back into the landscape and are barely indistinguishable from the rest of the trees.  (I’m sure there’s a nice little parable on humility in there somewhere.)

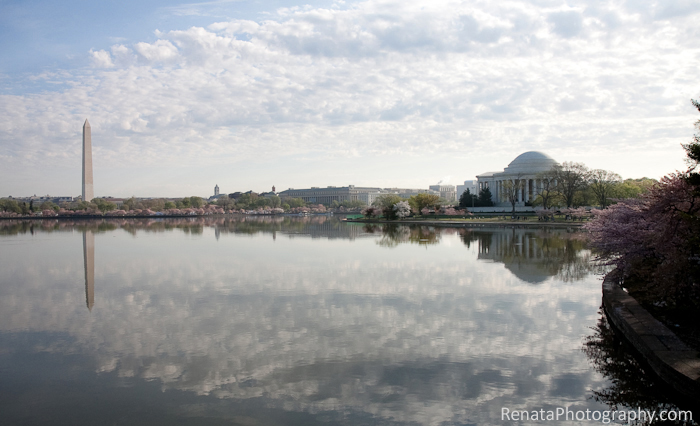
Sometimes I can’t even bring myself to go back to the Tidal Basin in Washington, DC during the non-blooming season just because I want the memory of the fragrant pink puffs that outline the blue water to remain being the last memory in my mind of those trees.  (I’m sure that’s a big part of why I always take so many photographs of them!)

I’ve included below some of the last images of the blossom season this year around the Tidal Basin.  I did bring myself to go back after the blossoms have all gone this time and have included the iconic Pagoda as the closing image, with and without the blossoms.

So until next year… Enjoy!


  • Eugen - April 30, 2010 - 10:34 am

    I especially like the first one – cheerful skies and light-penetrated earth-bound space.


Understanding exposure and the ability to control it is key in being able to create a good photograph.  I say “create a good photograph” because you really are in charge of “creating”  an image and are not just at the mercy of the camera.

I’ll discuss some basic concepts about exposure first and then help you determine what kind of various camera functions are helpful in achieving the best exposures in subsequent posts.  This way, you can start building your spec sheet of what to look for when buying a new camera or read up on the one you have to see how you can make the most of it.

How many times have I heard people say this about their pictures when showing them off to friends:  “Oh, this one didn’t ‘come out’  that great.”  Most often this is because the image is too dark (underexposed) or too bight (overexposed).

People take for granted that the camera has a built in light meter that measures the amount of reflected light in the framed scene.  The meter takes readings from the light bouncing off objects and the camera makes a calculation based on those readings telling the other settings to expose the image in a way so that it has an average light value equal to “middle grey.”  Why middle grey?  Because, middle grey is the average of black and white, absolute darkness and absolute light.  Most cameras with built in light meters, such as a point and shoot, are set by default to always expose the whole frame of your scene to an average of middle grey because it assumes that average photos people take have about the same amount of black and white, or darkness and light in it.

This is not a problem if you are habitually taking photos with an equal balance of light and dark.  But what if you are taking photos of a white dress and that white dress fills the frame?  You will mostly likely get a very grey looking dress.  What if you want to take pictures of a low lit room with candle light and you want to preserve the ambiance?  The camera will most likely pop the flash and put some light into your room, to push the overall light value to average middle grey.  If you disable the flash, it will slow down the shutter speed (more on that next week) and then you will likely get a lighter looking, but blurry picture of your low lit room.  Sound familiar?

So how do you take over and be the brains behind the camera?  That depends on the kind of camera you have.  Some very basic point and shoot cameras have very little, if no manual controls that let you override the default exposure metering system.  One thing to look for is whether or not there is an “exposure compensation” feature on the camera.  Exposure compensation tells the camera to either overexpose (make lighter) or underexpose (make darker) the overall light value from the middle grey reading the camera just took.  So if you were going to take a picture of a white dress, you would want to overexpose, or turn the dial to +1 or +2 stops depending on how much brighter than middle grey you want to go.  The same is true for the reverse.  For that candle lit room you would want to underexpose or turn the dial to -1 or -2 stops depending on how dark you want the scene to look.

SLR cameras have an exposure compensation feature as well, but with more customization, like letting you control the stops in increments of one half or one third stop at a time.  There are multiple ways an SLR meters the light, from measuring the whole frame and making an educated guess based on your focus points, this is called evaluative, to focusing on the center of the frame and on a narrow spot, called center weight and spot metering respectively.  Evaluative mode is a good all purpose mode to be in if used correctly, so I suggest you keep it set to this one and I’ll be referring to this mode as your default.

Now for an experiment. Try pointing the camera at a clean white wall and take a photo in full auto mode and see if the camera darkens the image.  Then point the camera at something very dark, almost black (like a dark coat or sweater) and make it fill the frame.  Try and turn off the flash and see if the camera tries to lighten the image when you take the photo.

Now locate the exposure compensation feature (you might have to dig out your camera manual to locate it) and retake the same white wall at +2 stops and the dark jacket at -2 stops.  Does the image brightness/darkness change and look truer to the original subject?  I’ll bet it does.  Try experimenting with the exposure compensation feature using the smaller increments first (+1 or -1) on some real photo worthy subjects that are not equally balanced with light and dark values and see if it helps you capture the scene more closely to the original look of your subjects.  Enjoy!

  • Zoe - April 16, 2010 - 10:53 pm

    I can’t wait to revisit these posts when I actually have a camera in hand! 🙂

  • Renata - April 17, 2010 - 11:00 am

    You know, this has me thinking… I’ll try to add a line or two in my future posts when relevant for those who don’t have a camera yet or aren’t really big picture takers, but just want to sharpen their skills in “seeing” whether it’s when they are observing their environment and choosing paint colors or looking at art in a museum.

    So, a great way to practice the principles from this post is to start training your eye to see the light values in an imaginary frame or a given setting. For example, try to remind yourself every now and then to look at a particular scene or subject, (especially in those moments when you think, “Oh, this would be a great picture, wish I had my camera!”), to take a few seconds and evaluate the light. Ask yourself if there is a balance of light and dark or is the light value in the scene a little more on the brighter or darker side of middle grey. Just doing this a dozen times or so will help kick start your eye to look for the light in a scene and start noticing shadows which is really important for a whole lot of things beyond just exposure, like composition and design.

  • Robert - April 28, 2010 - 5:27 pm

    You can also go to the Shutter Bee’s website where you can operate a virtual camera online. There are various scenes to demonstrate how different shutter/ aperture combinations affect the picture quality. The green arrow on the camera selects a scene, for example, ducks flying or a tourist with Greek houses in the background. Put your mouse on the aperture and then the shutter symbols and drag up or down to adjust these until the +/- meter bar on the left ends up in the middle of the scale indicating a good exposure. Then press snap to take the picture and see the result. Since it is a manual camera, you’ll have to press “again” to take another picture. Do a Google search for “shutter bee”. You may need a current version of Java for the camera to appear.

  • Renata - April 28, 2010 - 7:06 pm

    Well, that’s just the neatest little thing! Thanks Robert! I’ll be updating the TV/AV post with this; it’s a really great tool to practice the concepts with.
    I googled it and here’s the link: http://www.shutterbee.thinkrandom.com/

I love participating as fully as possible in the Triduum liturgies.  One special custom not often practiced in the Latin Church is the burial or entombment of Christ.  The Franciscan Monastery in Washington, DC has a “Commemoration of the Lord’s Burial” service on the evening of Good Friday that is always very special and moving, especially given that it has full scale replicas of the Stone of Anointing and Tomb of Christ.  An incredible choir sings almost hauntingly “Were You There” as the attendants carry the body of Christ into the tomb and seal it shut.  The first time a saw this it really hit me that once that stone was rolled over, they really must have felt the finality of Christ’s death and separation from him.

Given that we had a rather warm Easter weekend, I decided to go to an earlier Vigil so I could get up early enough to go to the sunrise Mass at that same monastery.  It’s held outside in a Lourdes Grotto replica and begins while it is still dark.  Then gradually light spills into the sky so that by the end of Mass the morning sun is shining brightly.  I love to look behind the grotto onto their open field just as the sun is coming up and imagine what it must have been like for the women to have walked through the garden and return to the tomb only to find it empty.  What a flood of emotions and thoughts must have been running through them.

Afterward, I make my own journey back to the Tomb and joyfully find it open and empty!  Both the Tomb and the Stone of Anointing are covered in flowers and the scent of lilies fills the air.  An incredible way to spend Easter morning!

  • Zoe - April 16, 2010 - 9:16 am

    Looks and sounds like a beautiful Triduum! I have to say I was a bit sorry I didn’t persuade you to attend the Basilica… it ended up being extraordinary — definitely one one of our best. No doubt heightened by witnessing our RCIA candidates come into the Church. We are blessed to have so many great choices in the DC-Baltimore area.

  • Renata - April 16, 2010 - 12:15 pm

    Thanks! I will have to do the Basilica for the Vigil one of these years though. Almost did this year, but I opted for a more low key and earlier Vigil just so I can have the energy to make one of my rare Easter Sunrise Mass appearances. The weather was just perfect for it this year.

F a c e b o o k